Showing posts with label DIY. Show all posts

Saturday, June 15, 2019

Can I Take Your Temperature?

'Cause you're lookin' HOT today!


I don't know about you guys, but my Summer got off to a rocky start, miraculously however, the temperature blanket is still in full swing.  I think I've been clutching it like a life-ring; as if getting each day's color on it will bring some semblance of order to chaos, and do a minor task like hold the entire universe together ... Or something.

In this moment it feels pretty marvelous to be able to come up for air after losing the larger portion of both April and May flattened by back-to-back viruses (or a cold + relapse, or some damn thing) which unceremoniously rolled into a month-long Facebook fast (that actually feels a m a z i n g, to be honest), with a good old fashioned tech flub thrown in for good measure.  Incidentally, did you know that when you upgrade your iPhone, you have to flip the little "messages" toggle to the "off" position in settings so that your new iMessages aren't sent to your old phone that's lying dead in a desk drawer for a month?  Oh, it's just me who had to Google that?  Super.  I'm now officially time-to-have-kids-so-they-can-explain-your-own-tech-to-you years old.

What's so irritating is that I thought I had everything all set up, but when I signed into a streaming app to try out a little adapter (the third one that didn't work because it didn't have audio capabilities like the description SAID it would!) for my clock-radio that keeps my office-space full of fresh tunes ... The one I refuse to junk simply because newer models are available--
Do you remember when people would keep their stereos, and all sorts of sound equipment for, like, decades?  Or even when parents would give their kids an old set, and all you had to do was upgrade the speakers if you wanted it to bump with a little more bass than the Perry Como records used to in your living room?  I miss that.  I also only buy things I really like, and refuse to throw them out by virtue of companies that make billions of dollars per year telling me I should buy the next new thing.  It doubly grinds my gears when they stop selling the parts, and adapters that let you fiddle with your gadgets, and make them work with newer components - there was an entire industry, and chains of stores dedicated to this very thing for the majority of my life, and now we're all just supposed to let our perfectly functioning small appliances wash up on some beach kids are trying to play on because Some Company decided to change the shape of the ports on their devices?  That's a negative, Ghost Rider.
End. Of. Digression.
Anyway, when you log into an app from an old device (and you haven't toggled your messages to "off") you run the risk of having all of your iMessages moving forward, rerouted back to that phone.  Allegedly, there was a notice that was supposed to accompany this switch-a-roo, but I don't remember such a thing ... Which means, I either swatted it away (because who just reads EVERY notice on their smartphone anyway?) or this all happened during a fever-dream, and I never noticed it.  These are both equally likely to have happened.

At any rate, if it's possible to simultaneously exist in a state of refreshed + flustered I think that's my current location.  And really, my mellow is only being harshed because I don't want folks to be thinking I'm out here just giving them the cold shoulder ... I mean, I'm pretty aloof as it is, but that's a new level (even for me)!

The good news is, with me finally mending up, and things being so quiet around here, I've been able to explore some ideas, and finish some old projects.  So, if that's the sort of thing you're into, and hanging around here for, look for some new to-do's, how-to's, and diy's coming a little later.  Also, if you haven't heard from your people in a while, charge up, and check any devices rattling around an old junk drawer just in case! 
xoxo

Sunday, January 20, 2019

Purple Rain


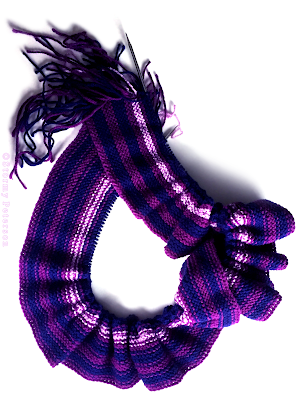
I like the idea of spending a little time each day doing something for myself that will result in an actual tangible outcome, so when the idea of making a temperature blanket found me I was pretty well sold on the idea from the start.  As 2018 wrapped up, and projects wound down I had begun negotiations with myself not to start any new, long, and drawn out activities for the upcoming year ... So, naturally, that's exactly what I did!  For the last couple of years, I'd been toying with the idea of knitting a "sky scarf," where you look out the window and whatever color the sky is at that moment of each day, that's the color you use to knit a row of your project, but this being the PNW, and all, I figured if I wanted a grey scarf with little bits of blue in it here, and there I could just make that in a weekend, and not drag it out for an entire year.  I'd also kicked around thoughts about the Doctor Who scarf, but does anyone really need a twelve foot long scarf?  Answer: Yes (but I just wasn't feeling it this time around).  I needed something easy, with enough color variation to be exciting to me, and something that wouldn't take up too much of my time, and end up feeling burdensome.

Enter the temperature blanket. 

Each day this year I'll be recording the temperature for my location, and knitting the corresponding
color into my blanket.  First, I needed to make my own temperature gauge, since the ones I'd found floating around the interwebs had numbers on them I see in these parts only a few times per decade, and I want to make a blanket that has more than three and a half colors in it.  Shrinking my color palette down to nine colors, and adjusting the numbers to reflect temperatures (in Fahrenheit) that are more common to my area was a crucial step.  Since my climate is so temperate, I'll also be recording the year's lowest lows to its highest highs transitioning on days when the temperatures stay the same both night, and day.  Not only will this make a more interesting blanket, and ensure the use of all of my colors, but the finished piece will depict a broader summary of the year's fluctuations.  To me, recording just the highs would be like telling a partial story.  Next,  all I had to do was figure out what on earth I was going to make.

Visions of chevron, and cabled lap blankets danced in my head, but I didn't want to have to learn something new for this, especially if it was going to be an everyday sort of thing, and since I began planning this around December 28th, I didn't feel I had enough time to perfect a new technique.  Also, this project is supposed to be relaxing and result in a gift for myself ... It's not going to feel like much of a present if I'm giving myself a headache every day for a year trudging through difficult patterns.

Then I found this

In a brief yet informative post, Staci walks us through everything we need to know about knitting a scrappy bedspread.  Bingo!  "I mean, why knit a little throw blanket, when you could knit an entire queen size bedspread?" I said to myself as I, once again, over-complicated something I'd been attempting to simplify, but when I saw her adaptation of Stephanie Pearl-McPhee's Traveler's Life Afghan pattern resulted in 620 rows of stitches, I knew I was barking up the right tree.  I wanted to knit a garter stitch piece that could accommodate my desire for knitting two rows per day which will give the blanket a solid cord of color for each day on one side resulting in clean, sharp stripes, and create a bit of a gradient effect on the other side.  In the end, mine will come out at 730 rows, which will probably create enough fabric to pull over my pillows and create a nice, old fashioned crease of a smartly made bed underneath them, but we shall see.  Like Staci, and Stephanie I'll also be using the color changes as a further design element by clipping my yarn free from its skein at the completion of every row to create fringe up both sides of the blanket as I go instead of having to add it later.  Hopefully, tying them off at 5 strand increments should work out alright (stay tuned).

If you're interested in joining in, it's not too late!  

You can use my color / temperature chart, make your own, or find something else online.  Pinterest, of course, is loaded with ideas, and if you're not into the Care Bear Stare of a color palette I've created, there are folks who've made some pretty slick tonal combinations that elevate the look of the entire project I think, and give it a little more polish, and make it feel a little more grown up (that I wouldn't mind trying myself at another time).  Anyway, if you do want to take the leap, sort your yarn out, and you can find a back log of daily temperatures HERE.  Just click on your region, and go to the light blue "NOWData" tab to narrow down your selection even further.  Once you do, you can then select the dates you wish to view, et voilà, all of the daily highs and lows!

The Knitty Gritty:
Needles - Addi 40" Circular size: US 9 (5.5 mm)
Pattern - Staci Perry's adaptation of The Traveler's Life Afghan by, Stephanie Pearl-McPhee
Yarn - Red Heart Super Saver Yarn (It's cheap, durable, and available in a wide variety of colors)

xoxo

Saturday, December 8, 2018

It's a Wrap! -- Winter Craft Project

I thought with schools about to press pause for winter break, that's a lot of days with a lot of hands with nothing to do until Christmas morning in some households (you can only bake, and decorate so many batches of cookies).  Also, with a lot of families looking for ways to minimize screen time, it can be fun to sit down together, and make some ornaments for your tree, or tabletop decorations.  I first learned about yarn wrapped sheep from The Inadvertent Farmer, during my search for a craft my niece could tackle ... Leave it to little folks to ask, "What else could we make?"

This is my answer to that. 

Sunday, November 18, 2018

It's a Wrap!


I'll be rolling out a new DIY project this December for anyone looking for something to do with youngsters over winter break, or hoping to make a dent in their leftover yarn stash!

Here's what you'll need:
Card stock, or snack / cereal boxes
Clothespins 
Craft paint & brushes
Glue-stick, and tacky glue (or Aleene's Stop Fraying)
Scissors
Yarn
*Optional*
Bamboo skewers
Blunt yarn needle
Knitting needles 3.25mm (US: 3, UK: 10)
Confetti, sequins, beads, faux gems, ghungroo bells

Don't let the stampede pass you by!

Friday, August 31, 2018

Dikya D.I.Y.


I've loved the sea, and nearly everything in it, my entire life, but there are a few tentacle-having friends that hold a special place in my heart; one being the Jellyfish.  Apparently, if Jellyfish show up in your life they are there to teach avoidance of danger, mistakes, and pain ... Possibly by stinging the hell out of you until you finally get it?

So, around eight years ago after seeing something in the background of a photograph of a woman's studio space I decided I needed to create a bloom of jellyfish for my nephew's sea-themed bedroom.  Years passed, and after seeing several people's creations (especially Sayuri Sasaki Hemann) but few attempts at any DIY tutorials, I'm coming at you with my straightforward method for low-cost, high-impact fiber art jellyfish.

Thursday, August 2, 2018

Rosewater D.I.Y.

FTC Affiliate Disclosure
So, I've already shared with you my Rosy Cheeks Toner recipe, but I kind of glossed over the steps to make your own rosewater at home.  Allow me to break down my process:
In this batch: Leaping Salmon & Pink Peace
First things first, I use the simmering technique, because it's faster, easier, and requires fewer supplies and less set-up time.  Also, because I use up my rosewater so quickly, I'm not worried about extending the shelf life the way the distillation method can.  For more information on the distillation process, check out Sheerin's video for Eve's Cafe, here.

Wednesday, March 14, 2018

(re)Purposely Playful

After eight years (and much nudging from my mother), I'm finally releasing my patterns + instructions for d.i.y. repurposed sweater-sleeve stuffed animals to the public!  So if you're keen to get your upcycle on, or work through your scrap-fabric stash, I'm pleased to introduce:

The (re)Purposely PlayfulWoodland Pals collection

The seven page downloadable PDF includes a materials list, instructions, and the pattern pieces you need in order to create your own adult, and baby sized stuffed friends in three animal versions: Faryl Fox, Rikki Raccoon, and Willie Wolf.

*Note: You are purchasing a downloadable PDF pattern only.  Adobe Reader is required to view, and print this pattern from your home computer.
Don't forget!  Grab your free knitting-crib-sheet, below, so your (re)Purposely Playful Woodland Pals are the best accessorized critters in the forest...
Click to embiggen, right click & save image as!

Take heed: The critters, and accessories created through the (re)Purposely Playful collection are keepsake toys, and intended for supervised playtime, or for youngsters who are not tempted to chew off, or swallow buttons and other small pieces.  Please use your judgement when making (and especially gifting) your Woodland Pals toys.  Thank you!
xoxo

Tuesday, December 20, 2016

Two Faced

Here we are in December, and if your winter is anything like mine it's been cold, and dry (dryer than usual for these parts, at least) so, I thought I'd share two of my favorite face recipes that help keep my skin from freaking out this time of year, or looking dull and grubby.  Ok, first up is...

Baby, I'm a Star Anise Scrub

Might not know it now, Baby, but I are!
Here's what you need:

Here's what you do:
 In an 8 oz glass jar combine softened coconut oil, and aluminum free baking soda in a 1:1 ratio (if using diatomaceous earth you'll want to use less due to the finer grit of the substance, so try for a 2:1 ratio).  Next, add 60 drops of anise seed essential oil, and 10 drops of frankincense essential oil, and with a small whisk attachment for your hand mixer, blend until the consistency reaches a smooth creamy texture.

Use:  I reach for this scrub about twice a week (don't use it too often, the goal is to still have skin), and use it pre bath or shower, do a casual rinse, and then hop into the tub since I'm not someone whose skin needs a ton of moisturizing.  Post bathing, my face is clean, and left with just the right amount of coconut oil to feel moisturized but not greasy.  I love using coconut oil in my beauty products, and routine, but you have to write yourself a different set of rules than the ones you're probably used to following with store bought products.  Nevertheless, this has become an absolute staple in my cabinet, it's also awesome on hands, feet, or if you find your elbows are getting a little neglected and rough.  A word of caution (or excitement, depending on your stance) anise seed essential oil is well-known as a possible "skin irritant" which, technically, could mean any number of things, but what I have found is that it will diminish the size or completely remove spots and moles from your face and body.  My mother discovered this quite by accident after mixing up her second batch of face and hand cream (her own creation), when the only change she made to the recipe was the addition of anise seed oil, and much to her surprise her sun-damage spots and other moles were vanishing from her face, hands, and arms.  I've since begun to use this essential oil neat as a spot treatment for pesky moles that look a little questionable, or in an inconvenient place, and it has worked in removing them.  For me, they just sort of dry up, and flake off.  I'm not sure if they will come back once I've stopped using the spot treatments, but if anyone has any experience with this, I'd love to hear from you, hit up my email on the sidebar!  Next up...

Get ready to make everyone green with envy!
Masque Envieux

Here's what you need:

Here's what you do:
In a small dish combine
1 Tablespoon of French Green Clay, and 1 1/2 Tablespoons (or a little more if it's too dry) of water and mix with a non-metal utensil.  As the mixture forms a smooth paste, add a drop of lavender essential oil, and fold into the paste.

Use:
First of all, it is wise to do a patch test on the upper inside of your forearm to see how your skin will react to the clay.  Once you know everything's cool, slather your face with your little green creation and let dry for NO longer than 15 minutes.  Remember, while these are pure ingredients and safe for most people to use, they are not cut with other useless ingredients that water down their effects like many store bought items we're accustomed to.  So really, if this is your first time using your home made clay mask, this is not the time to experiment with leaving it on an extra 5 minutes unless, of course, you're into that whole inflamed-face-look.

What's with French Green Clay, anyway?  Why do people use it?  This clay has been used to treat problematic skin, and inconvenient digestive issues since ancient times from Egypt to Rome, it's mineral rich, and aids in cell regeneration ... What's not to love?  A quick Google search of "French Green Clay history" will give you more information than you ever wanted about it.  Basically, it's the annoying overachiever of the clay world, but totally deserving of all its accolades.

So, now you know my winter beauty secrets aside from eating well, and drinking a ton of water, this is really all there is to it!


Thursday, June 30, 2011

Wrappin' it up!

Here we are at the end of June, and I thought we'd go out with a freebie.  I've worked up an easy to follow set of instructions for a somewhat quick project, and thought I'd share.  This is a perfect Beginner pattern to learn, and even better for the yet-to-begin-ner, so if you've been too timid to give knitting a try grab some needles, and let's go!


We're going to be making, what I call, the Pouch Hat since it looks a little like a sack to stow some treasures in.  It's a bit of a throw back to 90's fashion - Grunge, but cleaned up!  While I know not everyone shares my obsessive love of floral dresses over long sleeved t-shirts, clunky boots, and vulgar amounts of flannel, this hat easily coexists with trendier pieces in even the most updated wardrobe ... and is soon to be my newest favorite!


Yarn: Cherrycola by Red Heart

Materials:
Knitting needles size 9 (5.5 mm)
Yarn used in photo: (1 skein per hat)
Color: Marrakesh by Red Heart
Color: Oatmeal by Vanna's Choice for Lion Brand
Large-Eye Blunt End Needles 6-Pack

Cast on 84 stitches.

Work entire piece in Garter stitch (knit every row) until it measures 12.5" from needle to cast-on edge. 

Bind off. 

Next cut your yarn leaving a long enough tail to sew up your seam once you've folded your work in half with the wrong sides facing each other.  (How can you tell if it's the right or wrong side?  Look at your cast-on row, the right side should lay nicely with your other rows in a tight little twist.  The wrong side is "loopy" looking.)

Sew your seam, but reverse it for approximately the last 3" of your piece by turning your newly formed tube right side out, and finishing the seam from this side.  This will give you a finished looking cuff when you fold it up.


For the cord to cinch your hat, crochet a single chain, or create a single row of successive slip knots using your fingers.  The length depends on how large you want your bow to be, but a good starting point is approximately 24.5". 

Thread the tail of your cord through your large-eye blunt needle.  *Measuring down 2" from the bind-off end of your hat begin feeding your cord through the hat, skipping over 3 or 4 stitches.  I rock my bow to the side, so I didn't begin feeding my cord through the dead center front of my hat.  Using your seam as the center back guide to your hat, measure in about 5" and begin feeding your cord. 

*The cord for the oatmeal colored hat was started 1.5" down from the bind-off edge of the hat.

Weave in your yarn ends, and voila!  You've got a new hat!

Thursday, January 20, 2011

Going Guerrilla


Yes, sometimes the creative process is as rudimentary as scribbling on notebook paper with a Bic pen, using a hot chocolate canister's lid to draw the perfect sized circle, and laying it all out on the coffee table.  Thing is, many times you just have to strike while the iron's hot or you lose the idea, drive, ambition, whatever.  I can't tell you how many times a great idea has vanished forever on me simply because I didn't stop what I was doing and take a note, or make a sketch for later. 

I suppose now is when I'm supposed to mention the new year, clean slates, fresh starts, and dare I say it ... resolutions?  Well, I'm not going to.  I think especially in our society, we're quite in love with this idea of the do-over, possibly even greater my generation raised on video games equipped with reset buttons.  Don't like how things are going, hey, start over!  While I do embrace a little of that "philosophy" it's not exactly how things go, now is it?  I like the idea of not allowing yourself to be stuck in a rut, and if you find yourself in one, you can get yourself out of one, and start along a new path, but it's not so cut and dry as pressing the reset button.  You bring along all of your old ideas, and actions, and behaviors that got you there in the first place unless you resolve to change those as well as your direction.  What's that they say?  You can't run away from yourself.  I believe it to be true.  So with that in mind, no resolutions were made this year, just the continuation of what I believe I should be living everyday, which is to strive to be the best version of myself I can every single day.  It sounds really lovely to say, but means nothing at all if I don't actually put it into practice, as with most things. 

Back to the coffee table with this irregular girl to her fast moving, small scale operation of putting the craft back in Craft, quite possibly the dirtiest of words in the world of creating ... you know, ever since someone decided sugar cubes and glue were meant to be used together, and that popsicle sticks were a legitimate medium.  Viva la Revolución!

Until next time,
xoxo


"Be kind. Everyone you meet is carrying a heavy burden."
-Ian MacLaren

Wednesday, September 8, 2010

Let's Learn Something Today!

I have never let my schooling interfere with my education.
- Mark Twain
The rain has been pouring non-stop all night, and it sounds magnificent!  I love a good rainy day, not a misty-can't-make-up-my-mind-if-it's-actually-gonna-rain type of day, but a true rainy day -- the kind with the drops big enough to soak you with just a couple of their friends.  The rain has brought with it the beginning of another school season for many little children this week, and with that I thought I'd play teacher for a minute, and lay out some instructions for a little project that results in flirty, fluttery, and fabulous flowers (too much?).  Apparently I'll be teaching a side lesson on alliteration, and the abuse of it too!

Ok, so here's where we're going with this.  Once they're finished you can decide to make them into
hair pins, lapel pins, gift decorations, whatever!  You can sew buttons, beads, or a series of french knots in the centers for little spots of pollen, or think of something wild I haven't come up with, there's really no messing these up -- and even if you think you have, just start over!  They're so easy, and quick to make you won't even care.

So, where do we begin?  What you need is a good (cheap) synthetic fabric.  Synthetics melt, and curl when heat is applied, and that's what you're after for this project.  I used some organza scraps I've been lugging around for ages that I really dislike sewing with.  It ravels, and slips under my sewing machine's presser foot, and wrinkles like nobody's business, so while this isn't the first time I've considered burning it, at least this time I could burn it AND make something out of it at the same time! 

Thursday, April 23, 2009

I Told Myself I Wouldn't ...

... start a new knitting project for a while, but such is the life of a pie-crust promise (thanks Ms. Poppins!) - easily made / easily broken. So here I am on a moody, rainy day several rows deep in the basic of basic knitting patterns (brought to us by Her Highness), but I'm still a novice, and I've never worked from a pattern before and could use the practice at figuring out the lingo.


So far so good. I've only had to start over twice, but in my defense I couldn't decide if I wanted to go the full 32 stitches or shrink it to 30 stitches across. I know, I know ... two whole stitches, does it really matter? And the answer? I started over twice, fill in the blanks! Haha.
;-)

Thursday, March 26, 2009

I Rock Rough and Stuff with My Suffolk Puffs

We can thank Lady of Rage and her obscure early 90s song Afro Puffs for my title today, oh and a little place called Suffolk, and its patchwork technique used by its peasants a long, long time ago ... and this is pretty much where the history lesson ends.


There are some theories as to how the name came about ... I'm thinking, where's the secret? They're puffy, and apparently popular in Suffolk (once upon a time) enough for them to absorb the name. They made a come back in the 1930s and 1940s thanks to a little something we call a depression, and the convenience of these stylish little puffs being created out of rather small pieces, and scraps of fabric. We may be seeing them make another come back if the economy keeps it up (Dow up a hundred points? Heh, we'll see). Ok, enough mini-rant. Anyway, somewhere along the way they picked up the name Yo-yo ... which I found confusing the first time I heard it, I guess I'm too literal. I mean, sure they're round like the two outside pieces of a yo-yo, but lots of things are round, and there's no middle thingy, and where's the string?

As you can see I only got so far with my research on the origins of Suffolk Puffs. Really, I should be satisfied, but I somehow want more. But that's not important, what is important is the fact that I need about 974 more puffs for the future quilt I plan to make (at the rate I'm going, I may have that done by the time I'm 60. Perhaps that's a slight exaggeration, ok, I'll only be 59 by the time I'm finished). I'm kind of excited about this undertaking, even though I'm approaching it with the vigor of a garden slug, I like the idea of taking something traditional but doing it in unexpected materials, or more lively colors to get a different result. I hate to say it, but I find a lot of crafts, or projects extremely doubty, and tired looking, and completely uninspired. So that's why I've decided to rock some Suffolk Puffs ... my way!

Friday, March 20, 2009

She's Here, She's Here, She's Finally Here!!!

Spring that is. I just hope she's really ready to come out and play, and give poor PMSing March a break. Her nerves must be shot by now, with what her mood swings have been doing to my internal clock, surely my little bi-polar bear of a month needs a rest! Snowing one minute, 50* the next, a Pacific Northwest version of a monsoon the moment after that ... girl, I need a break, and frankly you do too.

So here's the deal. I'll stop talking about you behind your back, if you just promise to tone it down a little with the weather. I'm not asking you to move mountains here, just pick a season already. Truce?


I'm sorry, I don't have an olive branch, will these do?

Heather Bailey™ Bitty Booties Pattern: Here

*Edit: I don't exactly know which part of the truce thunder, hail, and sunshine is, but I do admire your sense of humor.

Thursday, August 28, 2008

Rainy Day Project

Well it didn't start out as a "project" sort of day, it was more of a rainy day - cleaning & organizing day, my kitchen being the perfect target. When right there in the middle of my raid I came across old packets of abandoned Crystal Light. My first thought being, how did this utter poison make it into my house? My second thought being *DYE PROJECT*!!!
I ransacked, and put back together my kitchen just in time to turn around and make it my laboratory where it looked like a Tupperware party collided with a VW bus full of hippies. It was worth it though, I swear I'm the last to jump on the dye your own yarn / thread wagon, and there were loads of different recipes and techniques that I wanted to try. So I put them to the test on sectioned out crochet thread that I haven't done anything with since a college project about a thousand years ago.

I think just having candy colored threads at my reach on whimsical spools would surely be inspiration enough for future projects relating to the materials or not! As you can see I had a few misses, but I think I've got some hits in there as well. I have no idea what I'll be doing with them now, but even if they're just used to tie up packages, or staking helpless flowers at least it'll be a little more exciting than using plain white. I think for now, though, I need to start making some of Thanks to these from this delicious blog post!

I can't wait to find out what kind of uses I have for this thread now. And I really can't wait to get started on a set of those spools for myself!

xoxo