

This is my answer to that.
So, if you've got your supplies ready, we can jump right in! All templates, and knitting instructions can be found at the bottom of this post.
 Before we begin, you'll need your templates. You can save, and print the sheets below, and transfer the animal shapes onto a sturdy card stock (some of you hardcore crafters out there print directly onto your card stock, so I know you're already ahead of the curve!) ... Cereal, and snack boxes work for this, also think of the unused back covers of spiral notebooks, they have a nice weight to them, and you won't have to worry about applying extra coats of paint to obscure any advertising. If you're doing this craft with a table full of children, I recommend pre-cutting several thick templates so no one has to fuss with flimsy printer paper that one slipped pencil, or rogue cut can ruin.
Clip your clothespins to an empty, and cleaned out tuna can (disposable cup, whatever) and give them each a good coat of acrylic craft pain. Get a good cover on the springs, just in case you like your animals a little thinner (I like mine fat, and fluffy, so the springs rarely show on mine). Set aside to dry while you cut out your animal bodies.

Get a nice coat of paint on both the head, and the rump area of your animals' bodies (both sides). The heads will be exposed, of course, but I like some color on the back end as well, just in case the yarn gets a little thin, or if it spaces funny after you've finished, there won't be any glaring "bald" spots. If your paint is a little thin, this might take a couple of coats, which is not a setback. Heavy paint layers are likely to make your card stock warp, and buckle, so go easy. If your legs are already dry, clip them onto the bodies to hold them steady while it's their turn to dry.
If you want to make any of your animals into Christmas tree ornaments (I think they'd be adorable on wildlife, woodland, or children's themed trees), this is when to use a small hole punch, and run some floral wire through the hole before wrapping your critter with yarn. Leave a long enough tail of wire, so it doesn't get swallowed up by your yarn!

Once your paint is no longer tacky, and you're ready to wrap find a permanent, and balanced place for your legs, and dab a dot of glue under the clamps of your clothespins. Slip your strand of yarn between one of your pins and the card stock for a little "insurance" that it won't unravel.
 Begin wrapping, by getting good coverage on the bum first. You want to anchor the yarn around the legs, up near the body to keep your yarn taught, and discourage it from sliding off the curve. Later on, the parts of the legs you need to help you do this part will no longer be exposed, plus, as you keep wrapping and bulking up your animal, the more the new layers of yarn keep the rump's yarn in place, so it's best to get this out of the way now. Once you're satisfied with the plumpness of your animal it's time to tie it off.
Step Four: Knotting, and securing.
 First, find a nice fluffy spot that looks like it has room under it to tuck a knot. Pull your yarn taught, and wrap it toward the back side of your animal, and snip it just longer than the spot you've found to hide your loose strand. Tie a knot at the end of your yarn, and trim off any unwanted fuzz. In your hiding spot, put a little more than just a dot of glue, and with your bamboo skewer (or in my case, my trusty Dollar Store chopstick) tuck your knotted end into the glue.
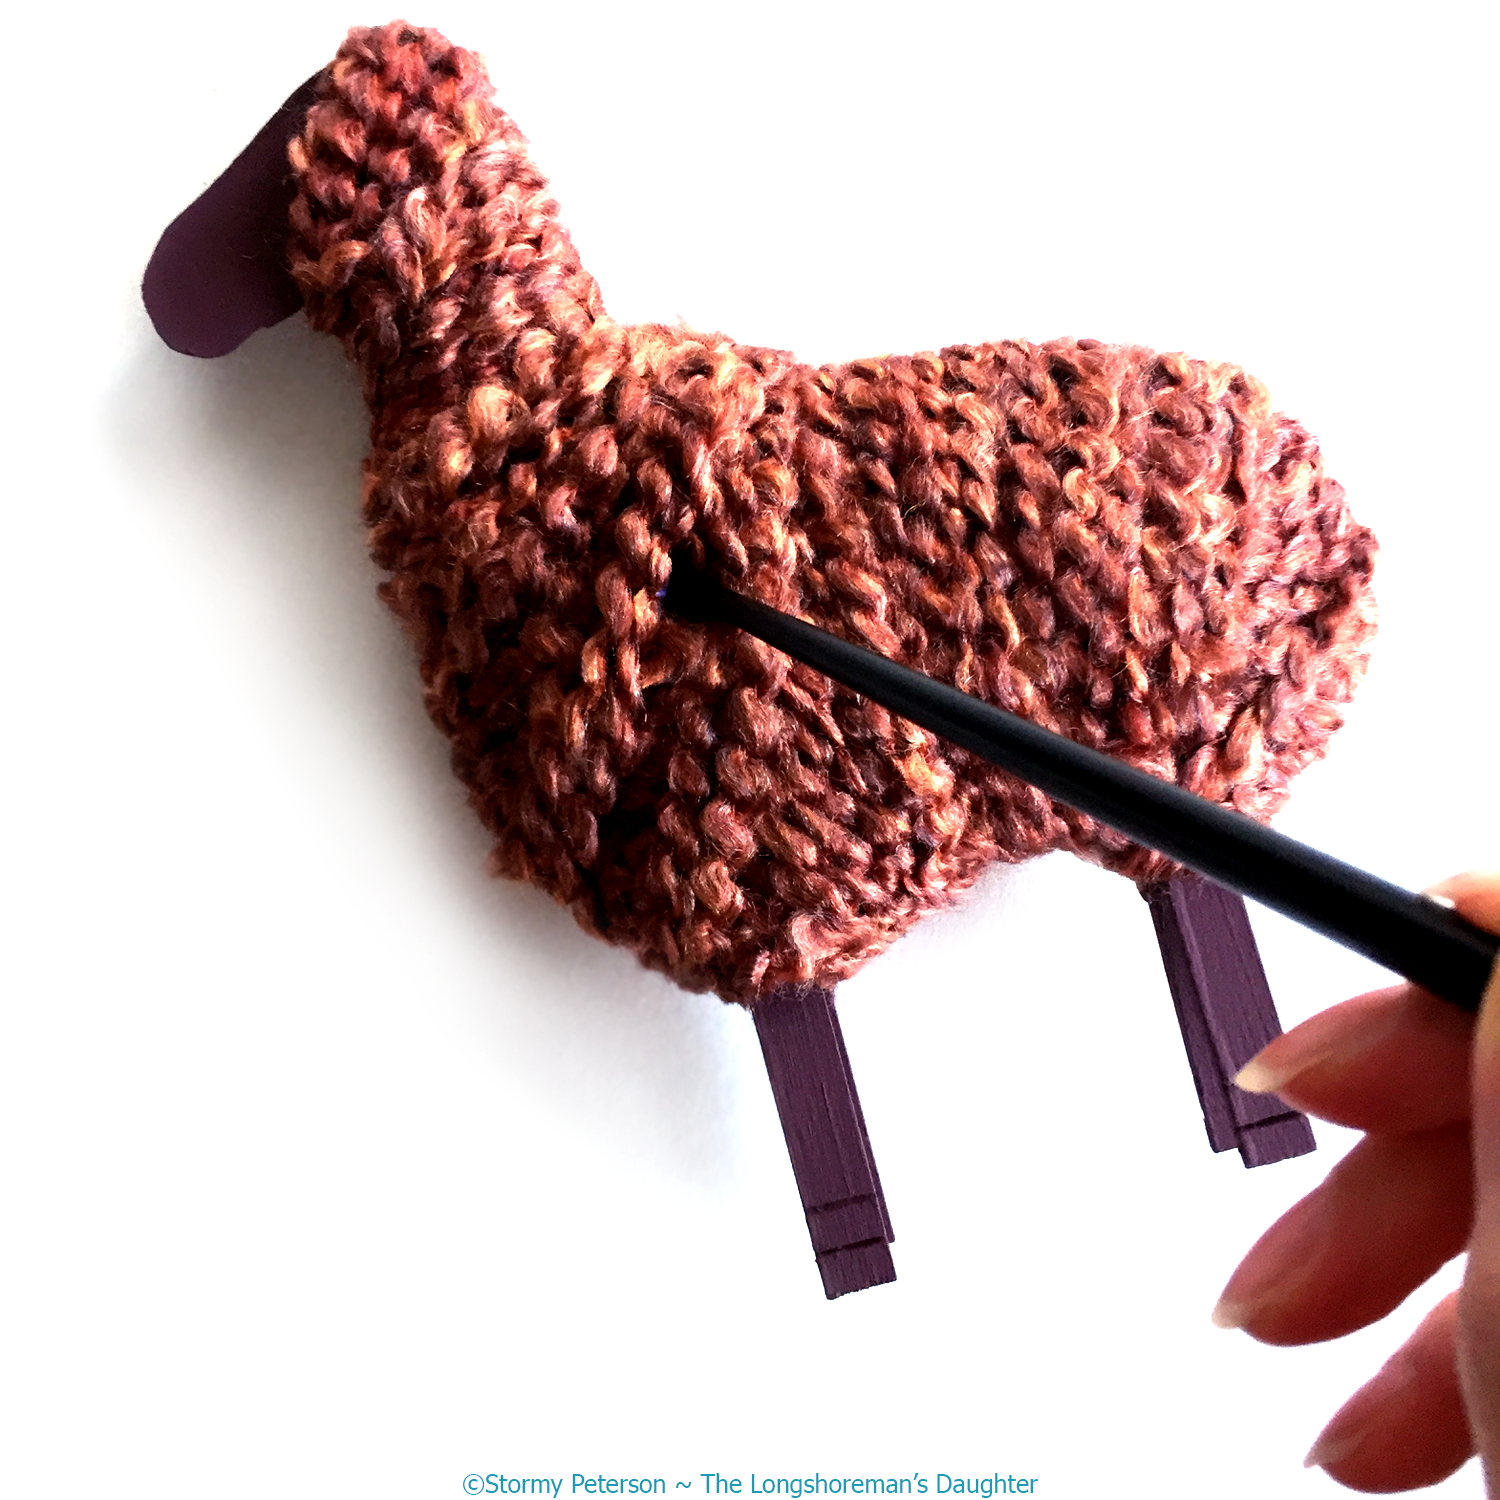


What I love about this project is that it's a great way to use up materials that there just isn't enough of to do anything else with. If you knit or sew, you know what it's like to have those random left overs that aren't big enough to be a project in their own right, but are way too big to feel comfortable just throwing away. Craft ideas like these, turn something almost useless into something sweet, and it keeps one more thing out of our landfills. Also, if you're on social media, and you make any of these, please hashtag it with #LSDitsawrap so we can all find your wonderful creations!
Templates


Click on each sheet of templates to make them larger, right click, and save image as, and you're ready to print them at home!
Knitting Instructions (Needles: 3.25mm, Size: US・3, UK・10)
Llama
(Yarn: Vanna's Glamour weight = 2, fine)Blanket: Cast on 13 stitches, work in garter stitch until length = 4". Bind off, weave in ends.
Saddle: Cast on 7 stitches, work in garter stitch until length = 3". Bind off, weave in ends, stitch onto blanket with contrasting yarn, and knot.
(I used a discontinued yarn, but two strands of a fine weight yarn used together will work)
Hat: Cast on 20 stitches, work in stockinette stitch until piece measures 3/4", and begin decreasing k,k,k,k2tog,k repeat across row, purl, k,k,k2tog,k repeat across row, purl, k,k2tog,k repeat across row, purl, on the final knit row bind off. Thread tail through bind off row, and cinch. Stitch the two sides of the hat together to form a seam, and securely knot at the rim of the hat.
Bison
(Yarn: Vanna's Glamour weight = 2, fine)
Carpet: Cast on 10 stitches, work in garter stitch until length = 5". Bind off, weave in ends. Feel free, with a contrasting yarn, to embellish your carpet, and stitch designs into it.
Camel
(Yarn: Vanna's Glamour weight = 2, fine)
Scarf: Cast on 7 stitches, work in garter stitch until length = 8". Bind off, weave in ends.
*Optional: Cut twenty 2" lengths of yarn and secure them two by two on each end of the scarf to create 5 sections of fringe. You may also wish to embellish the scarf with contrasting stitching.
Hat: Same as Llama.
Highland Cattle
(Yarn: Vanna's Glamour weight = 2, fine)
Lariat Scarf: Using 2-3 strands of yarn, begin with a simple slip knot, and work in a single chain / finger braid until length = 15.5" + 1.5" tails on either end.
Sheep
(Yarn: Vanna's Glamour weight = 2, fine)
Collar: Cast on 4 stitches, work in garter stitch until length = 5". Bind off, weave in ends. Cut a separate, small collection of yarns to connect to the ends of the collar, and use to tie it off. Attach bells, or ghungroo bells.
Fringe Scarf: Gather a selection of 9 strands of novelty yarns, cut at 22" lengths, and tie a secure knot in the center of the bunch.
Mini Tassels
Cut 2 two inch pieces of yarn, hold out your index + middle fingers horizontally, and place one of the yarns near the top of your index finger (this will be what connects the tassel to your knitted piece). Wrap the yarn you've chosen for your tassel 5 times around your two fingers, and cut it free from the skein. Pinch the two inch piece, and use it to help remove the loops from your fingers. With another length of yarn, securely tie the "neck" of your tassel (a dot of glue helps here), cut off loose ends, snip your loops, and trim them evenly. Using a yarn needle, connect it to your scarf, blanket, carpet, etc., securely knot, and dot with glue.